Emily Simon Photography
  • Home
  • Photography Portfolio
    • Weddings
    • Seniors
    • Babies
    • Maternity
    • Children
    • Family
    • Events
  • Blog
  • Pricing
  • Contact
  • Client Galleries
  • Facebook

Snow Activities!!

1/24/2014

2 Comments

 
This week we did several fun snow related activities since we received our first significant batch of snow. . and we weren't really going anywhere since it was subzero temperatures. 
PLAYING INDOORS WITH SNOW - SNOW BAKING

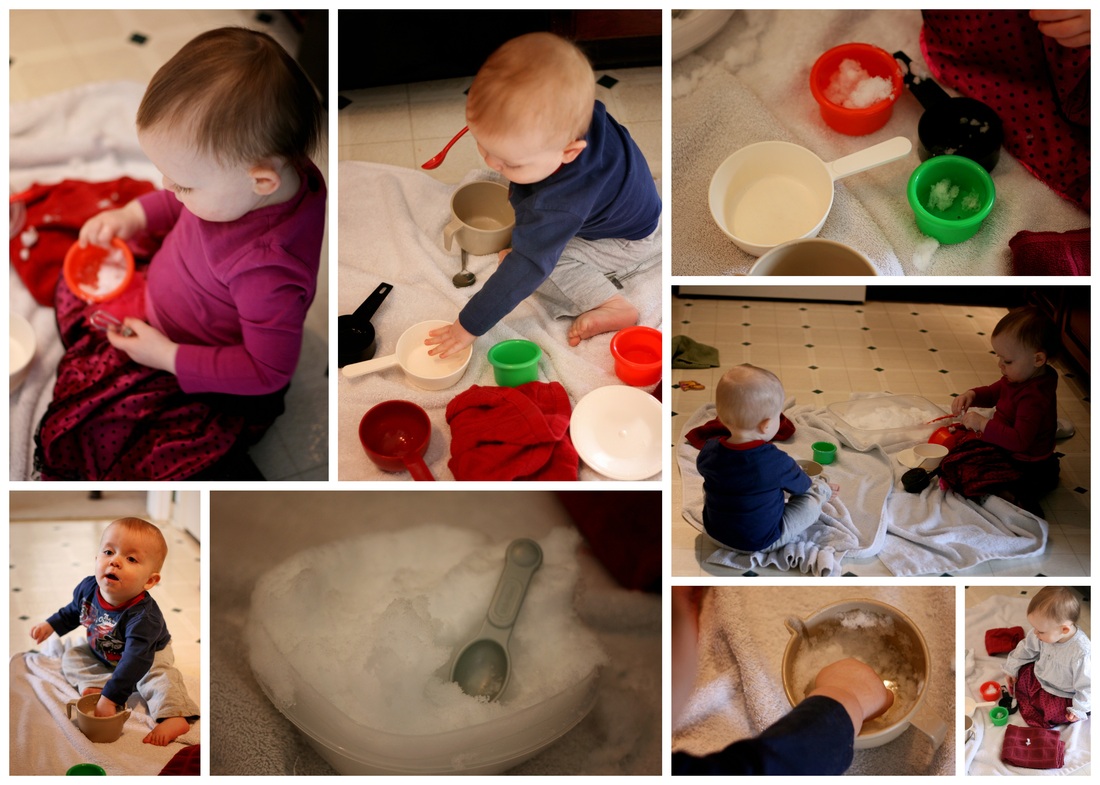
We grabbed a few towels and some play kitchen supplies for this activity. Then, I brought in snow and we baked pretend birthday cakes, muffins, and baby food. Both kids played until their fingers were red. We tried mittens but they weren't to Lydia or Miles liking for dexterity reasons. Miles loved just resting his little fingers in the snow and banging all the plastic together. Lydia was very purposeful and "mixed" the snow, placed it from one bowl into the other, and pretended to crack eggs. It's so fun to see the differences in the two of them.

We did this activity several times throughout the week and will probably do it again tomorrow with our new batch of snow. 
Picture
WE MADE SNOW CREAM! 

And it was sooo much fun. Lydia was excited to get to eat the snow for the first time. I used the recipe from the pin but decreased the amount of sugar. I didn't think that Lydia and I needed to share 1/4 cup of sugar. 

Here's the recipe I used:
  • 4 CUPS SNOW
  • 1 CUP MILK
  • 2 TBSP SUGAR
  • 1 TSP VANILLA

(Just a note: Snow cream from my childhood included a raw egg. . was this true for anyone else?)
Picture
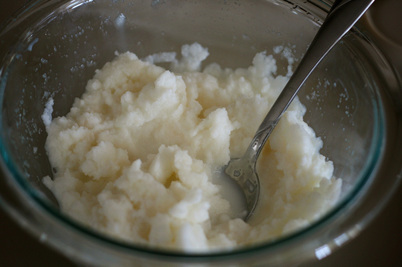
This is so easy and fast! And YUM!
Picture
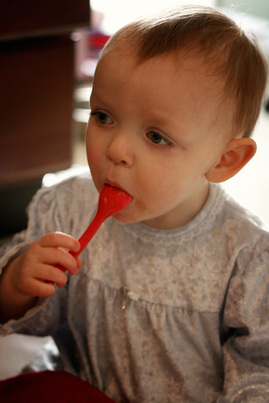
We started with a spoon. .
Picture
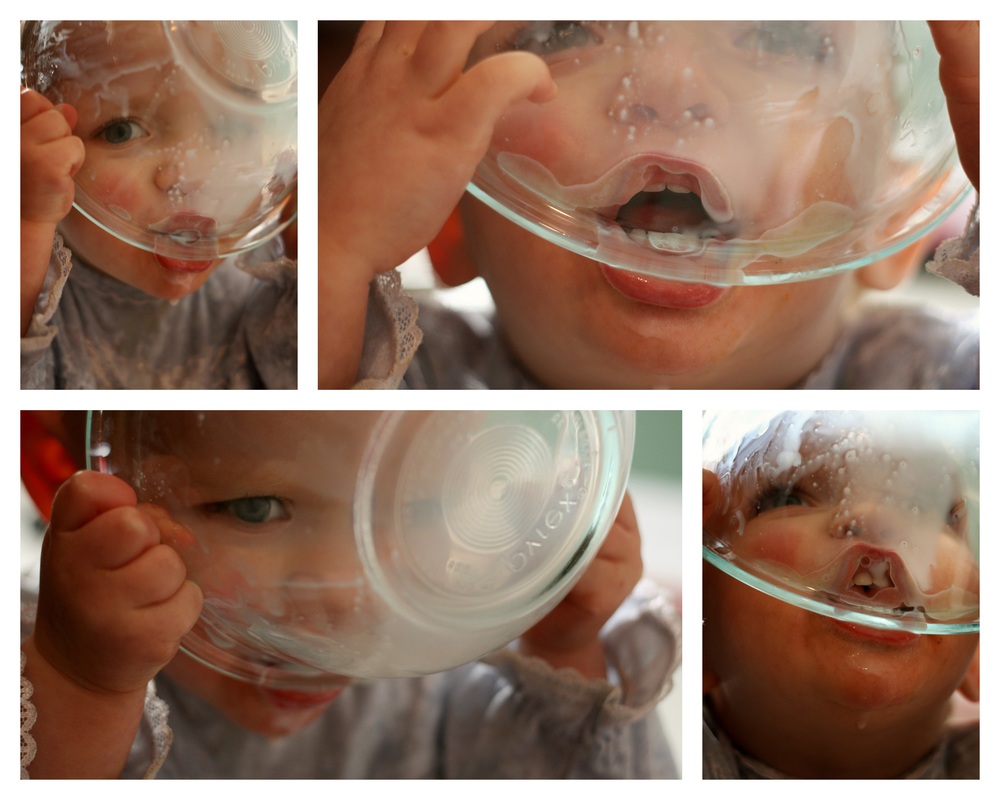
And progressed to licking the bowl and laughing at the pure silliness of the moment.
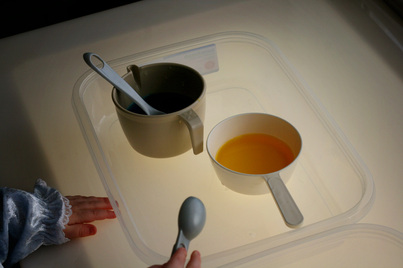
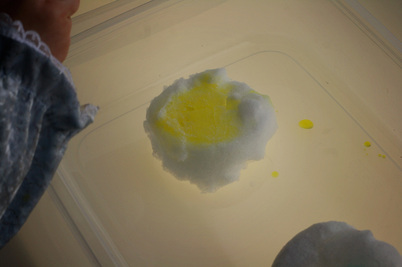
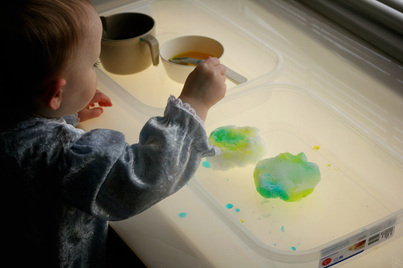
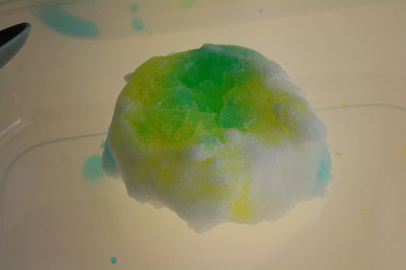
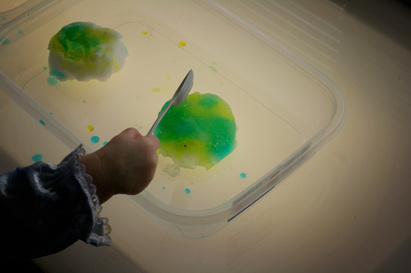
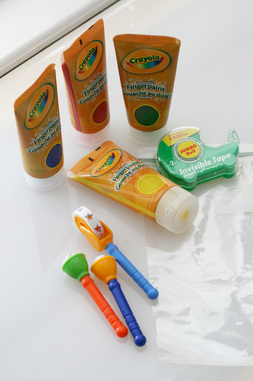
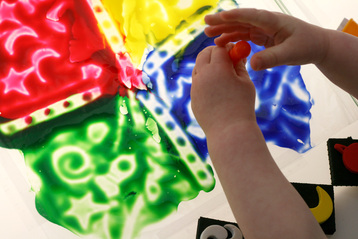
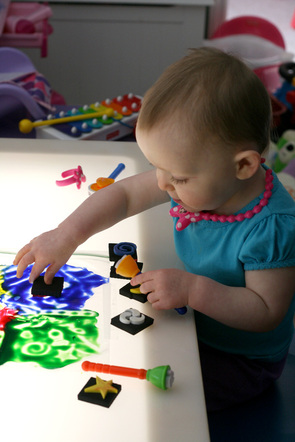
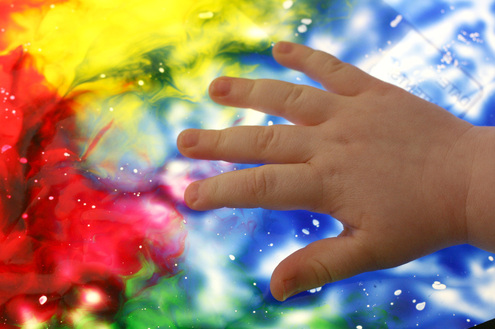
SNOW PAINTING ON THE LIGHT TABLE

I wouldn't necessarily call this painting since we basically dumped color from a spoon onto snow/ice . . but its up to your interpretation. Whatever we did it was fun.

I let Lydia pick the two colors we used and of course she picked yellow as one color. So we made yellow snow and blue snow. And then we talked about mixing colors and made some green snow. 

This was fun but not as well received as the pretend play we did with kitchen stuff. In fact, just to get her to do this activity we had to first make two "cakes" of snow and then pretend to be decorating them with the paint. Which she absolutely loved.
Picture
Picture
Picture
Picture
Picture
Snow is fun indoors or outdoors. With little people the indoor stuff is definitely ideal during these crazy cold temperatures. The main thing is to take advantage of the opportunities you have with snow when its around because it will be gone just as quickly as it came. 

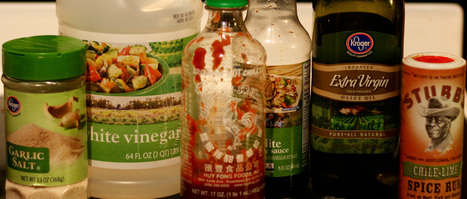
Here are the links to the Pins I used and referenced:
2 Comments

Roasted Cauliflower is Awesome - The End

1/22/2014

0 Comments

 
I tried roasted cauliflower for the first time and it might be a new favorite. I want to try it a million different ways. I semi-followed a Sriracha recipe for Kent and I and then made a lower sodium, less spicey version for the kids. Both were delicious and made me sad that I didn't have another head of cauliflower. 

The Sriracha recipe was delicious, well my take on it. I didn't have all the ingredients so I kind of went with what I had. Also, I think next time I will cut the slices of cauliflower thicker and roast them a bit longer. 

The ingredients that I used for the Sriracha Roasted Cauliflower:
Picture
The Sriracha Roasted Cauliflower recipe as I modified it:
  • 2 TEASPOONS OLIVE OIL
  • 2 TEASPOONS LITE SOY SAUCE
  • 2 TEASPOONS WHITE VINEGAR
  • 2 TABLESPOONS SRIRACHA
  • 1/2 HEAD CAULIFLOWER CUT INTO SMALL FLORETS
  • 1 TEASPOON STUBB CHILE LIME RUB
  • A DASH OR TWO OF GARLIC SALT (OR GARLIC POWDER IF YOU WANT LESS SODIUM)

Preheat the oven to 450°F.

Combine the first five ingredients in a large bowl. Add the cauliflower florets and toss to coat. Arrange the cauliflower on a lined baking sheet and roast for 20-25 minutes, turning once, until tender.

For the Lower Sodium Roasted Cauliflower I used the following ingredients:
  • 2 TEASPOONS OLIVE OIL
  • 1 TEASPOON LITE SOY SAUCE
  • 2 TEASPOONS WHITE VINEGAR
  • 1/2 HEAD CAULIFLOWER CUT INTO SMALL FLORETS
  • 1/2 TEASPOON LEMON PEPPER
  • 1/2 TEASPOON GARLIC POWDER

Picture
Both dishes were roasted on the same pan at 450 degrees for 25 minutes
THE RESULTS:
Picture
The Sriracha Roasted Cauliflower Recipe
Picture
The Low Sodium Roasted Cauliflower Recipe - with Mushrooms for Lydia
The pin with the recipe that pinspired me (I know, I'm corny):
0 Comments

Pinterest Project Week #2 - Unsuccessful Fizzy Paint and Hot Dog Squid

1/15/2014

1 Comment

 
For week 2, I tried a painting idea with the kids. It was obvious from moment one that Miles was too young which was fine. However, an un-napped Lydia wasn't listening like she normally does.

I provided a link to the pinterest pin below. AND I think we will try this again in the future. I mixed the paint too thin and didn't have a good dropper for the vinegar (the fizzy part).

In the end I just put baking soda and food coloring in a glass and poured vinegar in to show the cool volcano effect... and that was good enough for Lydia. Photos didn't happen for this project. Sorry about that.

We also had "hot dog squids" for lunch one day. It was fun and a big hit with Lydia. Miles didn't get to enjoy them in their squid form since he's not quite chewing.
Picture
Picture
Picture
Here she is enjoying it. :)


Here are the pins:
1 Comment

Pinterest project week #1 - Light table fun and a chicken recipe

1/9/2014

0 Comments

 
So, this is week #1 of my attempt at a New Year's Resolution and I'm very excited about it. I am going to try 52 weeks of Pinterest. . because otherwise I will just continue to pin things I will never do or at least try. I've named it My Year of Pinning. 

This week we set up the kids new light table so I went on a search for activities that involved a light table and items that I already had around. I didn't find anything right away that wouldn't require a trip to the store. 

Then, I found a pin that suggested you tape Ziploc bags filled with fingerpaints to a window. I thought that this would probably work even better on the light table. And it did. :)
Picture
Supplies: Fingerpaints, Ziploc bag, Tape, and items to make patterns and markings with.
Picture
Picture
Picture
Picture
Picture
I also tried a new recipe, Crock Pot Shredded Orange Chicken . This is so good. . even Kent loved it and he's not always a huge fan of crockpot meals. I didn't get to take a picture of it because it is all gone. The recipe fed my little family of four easily and I even had enough left for a large lunch the next day.

I didn't have orange juice concentrate but did have five oranges that were very ripe. I juiced the oranges by hand (in my fun old timey juicer from my friend's mom) and zested a whole orange. To add a bit of sweet to this dish I used 2 tsp of maple syrup which made it less healthy but more yummy. 

Here are the pins I used this week:

0 Comments

Christmas with the Simons

12/30/2013

0 Comments

 
Here are some highlights from our Christmas!
0 Comments

My homemade Kentucky art

12/29/2013

0 Comments

 
My brother in law, Kyle, does a  lot of traveling and is currently out of country. So, for his Christmas present I wanted to make something that he could take with him wherever he settles to remember his roots in the Bluegrass. 
Picture
0 Comments

Playdough Christmas trees

12/17/2013

0 Comments

 
Playdough Christmas trees is a super easy and fun afternoon activity. Lydia has enjoyed it on multiple occasions. I had a few ornaments break so I salvaged the sparkly parts for this activity. We cut trees out of green playdough with a tree cookie cutter. Then, Lydia and I decorated them with various sparkly things. The results were so great that I plan to get the photos that I took put on canvases to use as part of my Christmas decor.

Here is what you need:
- 1 can of green Playdough
- 1 Tree cookie cutter
- Whatever hard sparkly items that you want to use 
- Items that might make textures for garland

*I recommend finding "tree decorations" that will easily come out of the dough later.
Picture
Lydia places her sparklies in just the right place.
Picture
The finished product
Picture
Mommy can't walk away without making her own creation. . I've got to use my B.A. in Art for something, right?
Picture
More trees by Lydia
Picture
She's so serious about it
Once you have all the supplies together, which you probably have lying around your house, this activity is easy and fun. Plus, you can make as many as you want and take as long as your little one wants to. 

If you want something more permanent then you could carefully take the decorations off a completed tree and let it dry, Then, come back and hot glue the decorations back on. It might not last forever but for those children who like to keep their creations it should appease them for awhile. You could also use green clay (that you could bake later) for even more permanence and possibly an ornament or two.

The creativity with this is endless. I love these type of activities.
0 Comments

New blog for the New Year

12/16/2013

0 Comments

 
This is a blog that I'm starting for the new year. My new year resolution (other than the predictable "Lose Weight") is to attempt one project/idea/thing from my vast Pinterest collection every week of 2014. That means, that December 31st of 2014 I should find myself having completed 52 projects/ideas/things. I'm not good at diaries or blogs so we will see how this goes. :)

I also plan to share cool things that I see around the internet or photos that I wouldn't share on my photography blog.
0 Comments

Ornament exchange done DIY

12/1/2013

0 Comments

 
I'm involved in a yearly ornament exchange with some lovely ladies. This year I ventured into DIY territory... This was scary but I was happy with the results and plan to make some of my own after the Christmas rush is over.

Here are pictures of the two ornaments in process on the left and mostly complete on the right:
Picture
0 Comments

Lydia's 2nd Birthday Present

11/30/2013

0 Comments

 
Every night my husband, Kent, does a shadow puppet show for my oldest, Lydia. She loves it and even her brother Miles is getting in on the action. For her 2nd birthday I wanted to do something special that she would enjoy but I didn't want to spend too much since she is still too small to even remember her birthday. When I asked Lydia what she wanted she told me a puppet. She even specified the kind, a yellow cat.

I decided a puppet theater would be great. After scouring the internet and seeing how expensive the very thought of this was, I decided that I would need to make it in order to stay in budget. I found a few "puppet theaters" that were curtains to hang from nails or rods. So, with a lot of help from my mom, I made my own puppet theater curtain. 

Lydia loved the present and won't let me take it down even for a moment. 

Here are some photos of the process:
Picture
Here is the final product hanging up. 
Picture
Picture
Picture
0 Comments

    Author

    Emily is a photographer and stay-at-home mom. This is her blog about all the crazy fun she is up to.

    Archives

    January 2014
    December 2013
    November 2013

    Categories

    All
    Crafts
    Diy
    Family
    Food
    Pinterest
    Toddler Activities
    Toddler Activities
    Year Of Pinning

    RSS Feed

Proudly powered by Weebly
  • Home
  • Photography Portfolio
    • Weddings
    • Seniors
    • Babies
    • Maternity
    • Children
    • Family
    • Events
  • Blog
  • Pricing
  • Contact
  • Client Galleries
  • Facebook